Thursday, February 11, 2016

Thankful Thursday

Greetings, thanks for popping by.

So today I am thankful because today is actually my Friday. I'm off work for four full days! I love four day weekends!!!


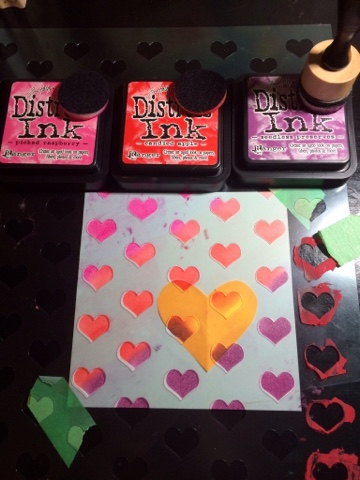
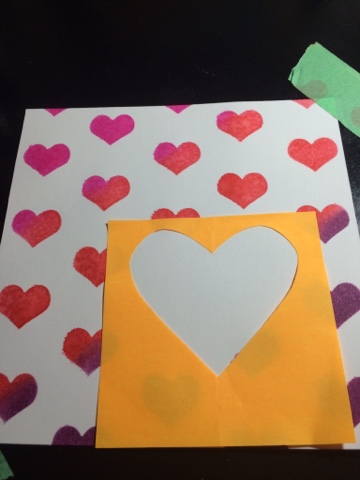
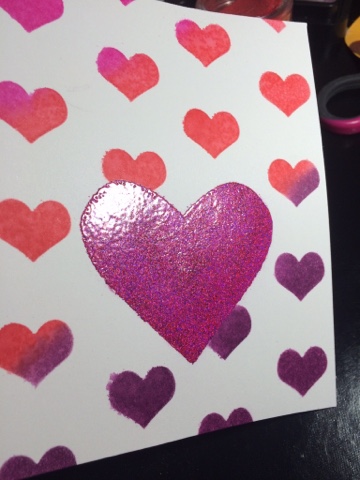
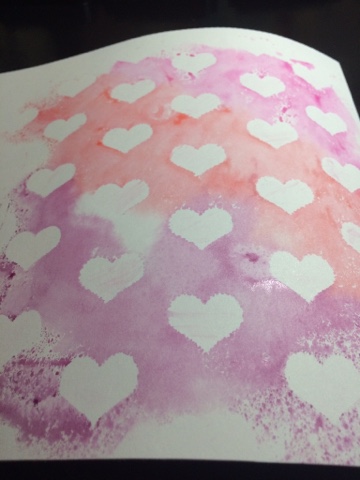
Today's post is somewhat a continuation of my yesterday's project. When I stencilled my card it created a fabulous negative stencil for me to use on another piece of paper. All I had to do was take my dampened stencil and flip it over onto another piece of paper. I love to make sure I'm making good use out of all my ink. Here is the negative image I was left with. So pretty right!! I love that watercolory look.


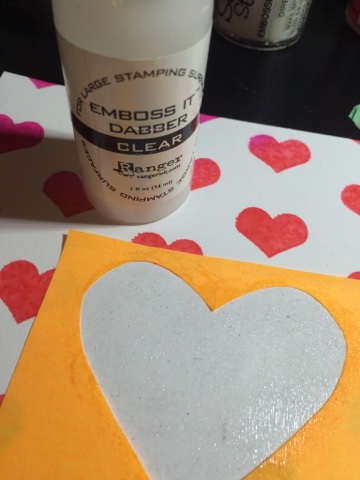
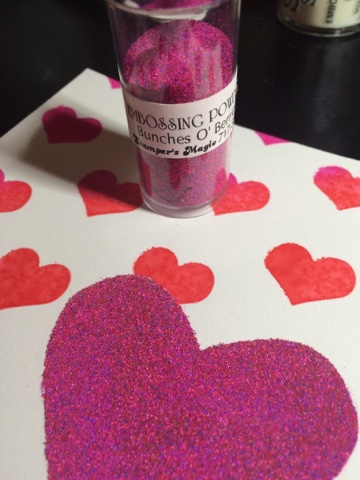
I put that aside and let it dry. Once dried I trimmed it down so it would fit on the front of my card.  I took my Tim Holtz scribble heart and die cut the shape out of my piece of inked paper. Then I also cut out a scribble heart from a red piece of cardstock. My go to basic paper is from the Recollections line at Michaels. Great value and a great selection of colours.


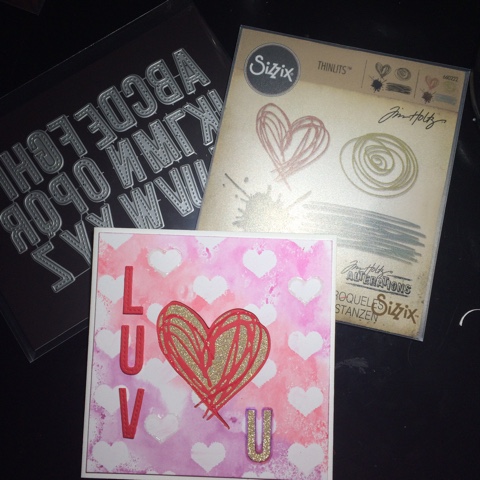
Next up I cut out the letters from the same red piece of card stock with the exception of the "u", I cut that out of Tim Holtz deco paper. I used MFT die-nam ices Stitched Letters to cut these out. I cut out a small piece of the gold deco paper to fit behind the red heart. This piece I mounted directly onto the card base. Then I put foam adhesive on the back of the Watercolor piece and adhered that down to the card. I added a little bit of a Ranger multi medium matte to the back of the red scribble heart and placed that into the opening. 

For the LUV letters I also cut these out of a thin foam so I could pop them up. I glued the foam to the letter with Sookwang tape. Love it for stuff I really want to stick. Then I glued it down to the card. Next I placed the U but found something was missing so I took my distress markers and added a bit of outline around the letter. Lastly I used my Watercolor brush to blend out the marker a little bit. 

That's my project for today. Happy Friday 😉 


Wednesday, February 10, 2016

The Daily Marker 30 Day challenge Day 8

Hi everyone, Michelle here with Day 8 of The Daily Marker 30 day challenge. 

Where did that first week go??? Here it is Wednesday already and I've already lost a day ... But lucky enough for all that is lost can sometimes be found. Thank God for that otherwise I would be still looking for my brain 😳😉 lol.


Since that big day is coming up where most celebrate that big word LOVE I thought I would pay tribute to all the loveliness. My card today was inspired by my lovely Heidi Swapp tiny heart stencil. Simon Says stamp has this wonderful stencil in stock. Here is the link: https://www.simonsaysstamp.com/product.aspx?id=127852


This project combined 4 main elements: Tim Holtz Distress Ink Pads/Blending Tools, Heidi Swapp Tiny Hearts stencil, Embossing Powder and the Close to my Heart stamp set called Sweet and Lovely. It really doesn't take too much to give you that wow factor and an idea, if you do not have a stencil, is to take a small heart punch and create your own by punching a pattern out of a heavy weight cardstock.

So I started out by cutting a heart out of a post it note. The easiest way to get a balanced heart is to fold the paper in half and then cut. I will be using both pieces of the cut out in this project.


Next I placed the heart under my stencil to create a blank space. I cut the heart out near the top of the post it so the sticky part will help it stay in place under my stencil. 


Coloring part ... My Favorite. Using a ink blending tool add colour to the top left, I started with Picked raspberry. You can either tap the colour down or use a circular motion, which I prefer. Then the next colour was Candied apple and then the final color was Seedless preserves. When switching colours make sure to overlap them so you get a blended look. 


Next give it a couple of spritz with your water mister. This help the colours to blend and gives the edges of the hearts a bit of a watercolour look. You can skip this step if you like. Once done remove the stencil and let dry.  TIP: you will have left over ink on your stencil, take the stencil and flip it over onto another piece of white paper and you will have another lovely piece of patterned paper. I am using that paper on my Day 8 project.


Next up I wanted to fill that "blank" area with an embossed heart.  This is where the post it "negative" comes in to play. Place it down overtop of the blank area and line it up with the edges of the hearts. Remember how I cut it out near the top of the post it, this is why. Now I have the sticky part on the top of the post it to keep it stuck down.  FIRST ( sorry I'm not yelling but really want you to do this part) use a powder tool overtop of the whole surface prior to putting down the sticky note. This will help to keep the embossing powder from sticking to the whole paper.


Time to add in the Emboss it by Ranger. This stuff creates a sticky surface for the embossing powder to stick to.  Dab it on, over top of the blank area of the post it, generously. You want lots of that goopy stuff down.

Remove the sticky note and then add your embossing powder. Tap off the excess into a coffee filter which makes it easier to put the excess powder back into the jar. I used a powder, which I am coveting, from a company that unfortunately is no longer in business (very sad). This powder has a mix of red, pink and purple which you could recreate yourself by mixing those colours together. Brilliant why did I JUST think of that! 


Yummy I just love that picture!! Continuing on, take your heat gun and apply heat to the powder just until it melts.  Do not over melt it because this will cause it to smoke and then possibly catch on fire .. No fires allowed!! 


Voila!! Enter the yummy looking shiny heart. This kind of reminds me of a gummy heart!! 


Now we want to add the sentiment. I thought this "lovely" stamp from the Close to my Heart Sweet and Lovely stamp collection would go perfect on top of that heart. I like to use Rangers Archival ink on almost everything as I like how it really stays and gives you a nice crisp stamp.

So that's my project for today. I am a day behind on the challenge due to me having come down with a really awful cold so I will be skipping one day this week but "I'll be back"!!! As Arnold would say. 

Cheers everyone and happy creating!!


Monday, February 8, 2016

The Daily Marker 30 day challenge - Week one recap (Day 7)

Hi everyone I'm back with my final recap of week one of The Daily Marker 30 day challenge.

I'll be honest, when I made the decision to recap my week in one day I thought it was brilliant! Today is recap day and I have decided that my head may have been a little foggy when I made that decision ... LOL! 7 blog posts in one day OY!! Anyways it's here, I am almost done and I must say it's really been great to look over my week as I am making my posts. Each day is completely unique from the other in many different ways and I'm thankful today that I am lucky enough to be able to join this great journey. It really is a journey for me because I am trying to challenge myself to try something different. Learning is a wonderful thing and this community is so supportive of your work no matter what level you are at. I've had some wonderful comments on Instagram about my projects and it's so nice to get that feedback! People are seeing my creations and I'm getting ❤️!!! So awesome.

Day 7  - Blossoming thoughts


Supplies: Layer 1 - Nina heavyweight cardstock (embossed with copper using Jennifer McGuire's technique), Layer 2 - Strathmore Bristol paper, Stencil - 201 stencil by Roth, Artists Loft modelling paste, Simon Says Stamp Circle Sayings, Random heart stamp, Vellum from Michaels, String from Home Sense, Tim Holtz Distress Reinkers (to color the paste).


The Daily Marker 30 day challenge - Week one recap (Day 6)

Hey everyone Michelle here with my recap of Week one of The Daily Marker 30 day challenge. 

Today I am continuing on with my use of stencils. Such an easy way to get a beautiful image down on paper or whichever surface you may be using. So many possibilities too like in the case today's project. This stencil actually came with the three layers included. 3 for the price of 1, I love that!!

Day 6 - Bird on a branch looking through a patterned window (??? Sounds good I guess ... Haha)


Supplies: As shown above, Heidi Swapp stencil Bird, Stratmore Bristol paper.

The Daily Marker 30 day challenge - Week one recap (Day 5)

Greetings crafty people. Welcome to my Day 5 recap of The Daily Marker 30 day challenge. 

As in Day 4 (part 2) I am working with modelling paste today for my project and am having fun creating these wonderful colours of paste. There are so many possibilities when it comes to this medium! I've used it on canvases, mixed media and cards. I almost used it to ice some cupcakes once but "pwepf" lucky cupcakes were saved before they were subjected to this non edible medium. Just kidding but like I said in my previous post this stuff has the consistency of a thick icing. YUM!! 

Day 5 - Stencil magic


Supplies: Gold background paper - Tim Holtz Deco sheets, White paper - Strathmore Bristol paper, Stencils by Americana, Modelling paste - Artists Loft modelling paste, Tim Holtz Distress Reinkers (to add color to paste), Heidi Swapp planner accessory saying.

The Daily Marker 30 day challenge - Week one recap (Day 4 Part 1)

Hi all today I'm on Day 4 of The Daily Marker 30 day challenge and today is crazy bird day!!

Tim Holtz Bird Crazy literally went crazy last year when they were launched and I jumped right on that crazy train!!! Hard not to with these little birds. Today is about good old coloring! I like to think outside the box when it comes to these birds and last year I created an ATC with my Bee Bird and he is little Mr. Popular on Pinterest! (87 pins and counting) Who knew that he would create his own following?? Not me! Here his pin! https://www.pinterest.com/pin/A7fBcAAQQI0CgVIxyGEAAAA/ and he is also on a previous blog post.

Here is my Christmas dude I made for on top of my Mason Jar snow globe.


Anyhoo it's easy to get sidetracked with these cute little dudes so here is my Day 4 coloring for the challenge inspired by my Bee Bird!


Supplies: Tim Holtz Bird crazy stamps, Strathmore Watercolor paper, Tim Holtz Distress Markers, Watercolor brush! 


The Daily Marker 30 day challenge - Week one recap (Day 4 Part 2)

Hi Blog World welcome to my recap of Day 4 (two projects) for The Daily Marker 30 Day challenge.

The next few days are all about Modelling paste and Stencils. Modelling paste is one medium I really have fun playing with because it's like working with icing. I love the scrumptious colours you can get by mixing the paste with different types of colouring mediums. It really is like mixing icing!!! 

Day 5 - Project trees


Supplies: 
Layer 1 Base layer (Platinum) - Nina heavyweight cardstock and platinum embossing powder (see Jennifer McGuires video here -( https://www.youtube.com/embed/mLsooRinBPo?autoplay=1&TB_iframe&width=640&height=480 ) on how to create those beautiful background papers without actually buying the metallic papers.
Layer 2 - Strathmore (yellowbook) Watercolor paper, Memory Box Garden Birch Trees stencil, Artists Loft Modelling Paste from Michaels (cheap and great alternative to the more expensive brands), Faber Castell Gelato, Tim Holtz Distress Marker in Hickory smoke & Gelly Roll shimmer pen for the markings on the trees.


The Daily Marker 30 day challenge - Week one recap (Day 3)

Hi everyone here again with my recap of The Daily Marker 30 day challenge. 

Day 3 - Blooming watercolor

Today's post is using one of my Favorite techniques I call Emboss it, Drop it, Blend it and Voila! I don't really call it that but I thought it was cute (haha) Seriously though I love how this looks on any project. All you do is stamp your Favorite image on Watercolor paper with Versamark (use a stamp that has some white space that you can color), add embossing powder and heat it up to melt the powder, draw some color into the white space ( two levels of the same color per petal/stem), take your Watercolor brush (not too much water on it) and blend. If you find that you need more dimension just wait for it to dry and add more colour where you need it. That's it! It's that easy - Really it is and it takes hardly any time to create these lovely little bouquets.

I originally started with the gold one but wanted to try one with clear embossing powder as well. It's a toss up for me which one I like better. The elegant gold or the ethereal clear???


Supplies: My go to Watercolor paper (Strathmore yellowbook), Tim Holtz Flower Garden cling stamps, Ranger Queens gold embossing powder, Clear embossing powder, Tim Holtz Distress Markers in (Purple flower- Seedless preserves, Wilted violet, Spiced marmalade, Fired brick, Carved pumpkin), (Red flower- Candied apple, Fired brick), (Teal flower - Lucky clover, Cracked pistachio, Lemon citron), (Stems - Forest moss, Peeled paint)

The Daily Marker 30 day challenge - Week 1 recap (Day 2)

Hi everyone Michelle here and welcome to my Day 2 recap of my journey through The Daily Marker 30 day challenge.

Day 2 - Circling the negative space

So Day 2 was inspired by the awesome uber talented Jennifer McGuire. Dang that lady is talented!! She created a gorgeous card using the "negative space" technique and right away I wanted to jump on board that technique train! I mean what a simple way to create some wow on your card. Here is the link to her blog post http://www.jennifermcguireink.com/2016/02/coloring-2.html 


Supplies used Card 1) Pink chevron background - Craftsmith brights paper pack from Michaels, White background circle - Recollections open stock from Michaels, Pink embossed circle - Strathmore (yellowbook) Watercolor paper, Tim Holtz Distress Markers in (Picked raspberry, Candied apple and Spun sugar), Swirly background stamp - I believe this is from Hero Arts, My Favorite Things - Scribble roses, Simon Says Stamp - Circle sayings, Clear pearl embossing powder (swirls), Ranger red embossing powder (rose), Ranger Queens gold embossing powder (sentiments and heart)

Supplies used Card 2) Red chevron background, White background circle - Recollections open stock from Michaels, Pink embossed circle - Strathmore (yellowbook) Watercolor paper, Tim Holtz Distress Markers in (Picked raspberry, Candied apple and Spun sugar), Batic background stamp by Recollections, Ranger Queens Gold embossing powder, My Favorite Things - Stitched letters die and Scribble Roses Die-namic dies and Clear stamps. 

The Daily Marker 30 day challenge - Week 1 recap (Day 1)

Hi everyone Michelle here with my Week 1 ( Day 1) recap of The Daily Marker 30 day challenge.

www.thedailymarker.com

I heard about this great challenge through the creative "grapevine"! For Kathy this is her 4th time challenging all of us artists to "colour something each day for 30 days". I jumped on board right away because to be honest, I was in a bit of a creative slump! Before Christmas I was a card making machine and created about 100 cards in order to get ready for the annual Christmas craft fairs. Each one made from scratch and while I love love what I do it was a bit on the hectic side. Glue this, colour that, blend this, erase that ... Repeat, repeat, repeat LOL! So I took a bit of a break and just like that, "Voila" Kathys challenge appeared. Perfect timing!!! It was meant to be. 

So here is a recap and supply list of my products used on Day 1. Day 2 to follow.

Day 1 - Mahalo


Layer 1 & 2 - background paper ** Michaels recollections basic paper (open stock)
Layer 3 - blue sky ** Strathmore (yellowbook)  Watercolor paper, Tim Holtz Distress Ink/Blending tool - Salty Ocean and Blueprint sketch. I cut a cloud shape out of scrap paper and inked over the shape to create a sky like background. 
Layer 4 - watercolored frame ** Stratmore (yellowbook) Watercolor paper, Avery-Elle stitched rectangle die (to cut out frame), Tim Holtz distress markers - Seedless preserves, Twisted citron, watercolour brush to blend colours. Just draw on the paper with the marker and then blend out with the Watercolor brush.
Layer 5 - characters ** My Favorite Things Polynesian Paradise stamp and die sets, Ranger Archival Ink in Jet Black, Tim Holtz Distress Markers in : (Seedless preserves, Dusty Concord, Mustard Seed, Mowed Lawn, Picked Raspberry, Twisted Citron), Martha Stewart glitter.